> ## Documentation Index
> Fetch the complete documentation index at: https://docs.thirdcloud.io/llms.txt
> Use this file to discover all available pages before exploring further.
# CC Switch使用教程
### 什么是 CC Switch
CC Switch 为你提供一个桌面应用来管理所有支持的 AI 工具。无需手动编辑配置文件,你将获得一个可视化界面,一键将供应商导入应用,一键在不同的供应商之间进行切换,内置 50+ 供应商预设、统一的 MCP, SKILLS 管理以及系统托盘即时切换功能——所有操作都基于可靠的 SQLite 数据库和原子写入机制,保护你的配置不被损坏。
* 一个应用,七个工具 — 在单一界面中管理 Claude Code、Claude Desktop、Codex、Gemini CLI、OpenCode、OpenClaw 和 Hermes
* 告别手动编辑 — 50+ 供应商预设,包括 AWS Bedrock、NVIDIA NIM 和社区中转服务;一键即可切换
* 统一 MCP, SKILLS 管理 — 一个面板管理 Claude、Codex、Gemini、OpenCode 和 Hermes 的 MCP, SKILLS, 支持双向同步
* 系统托盘快速切换 — 从托盘菜单即时切换供应商,无需打开完整应用
* 云同步 — 通过 Dropbox、OneDrive、iCloud 或 WebDAV 服务器在不同设备之间同步供应商数据
* 跨平台 — 基于 Tauri 2 构建的原生桌面应用,支持 Windows、macOS 和 Linux
* 小工具 - 内置了多种小工具来解决首次安装登录确认、禁止签名、插件拓展同步等多种功能
### 软件下载
下载地址:[https://github.com/farion1231/cc-switch/releases/latest](https://github.com/farion1231/cc-switch/releases/latest)
### Codex 配置
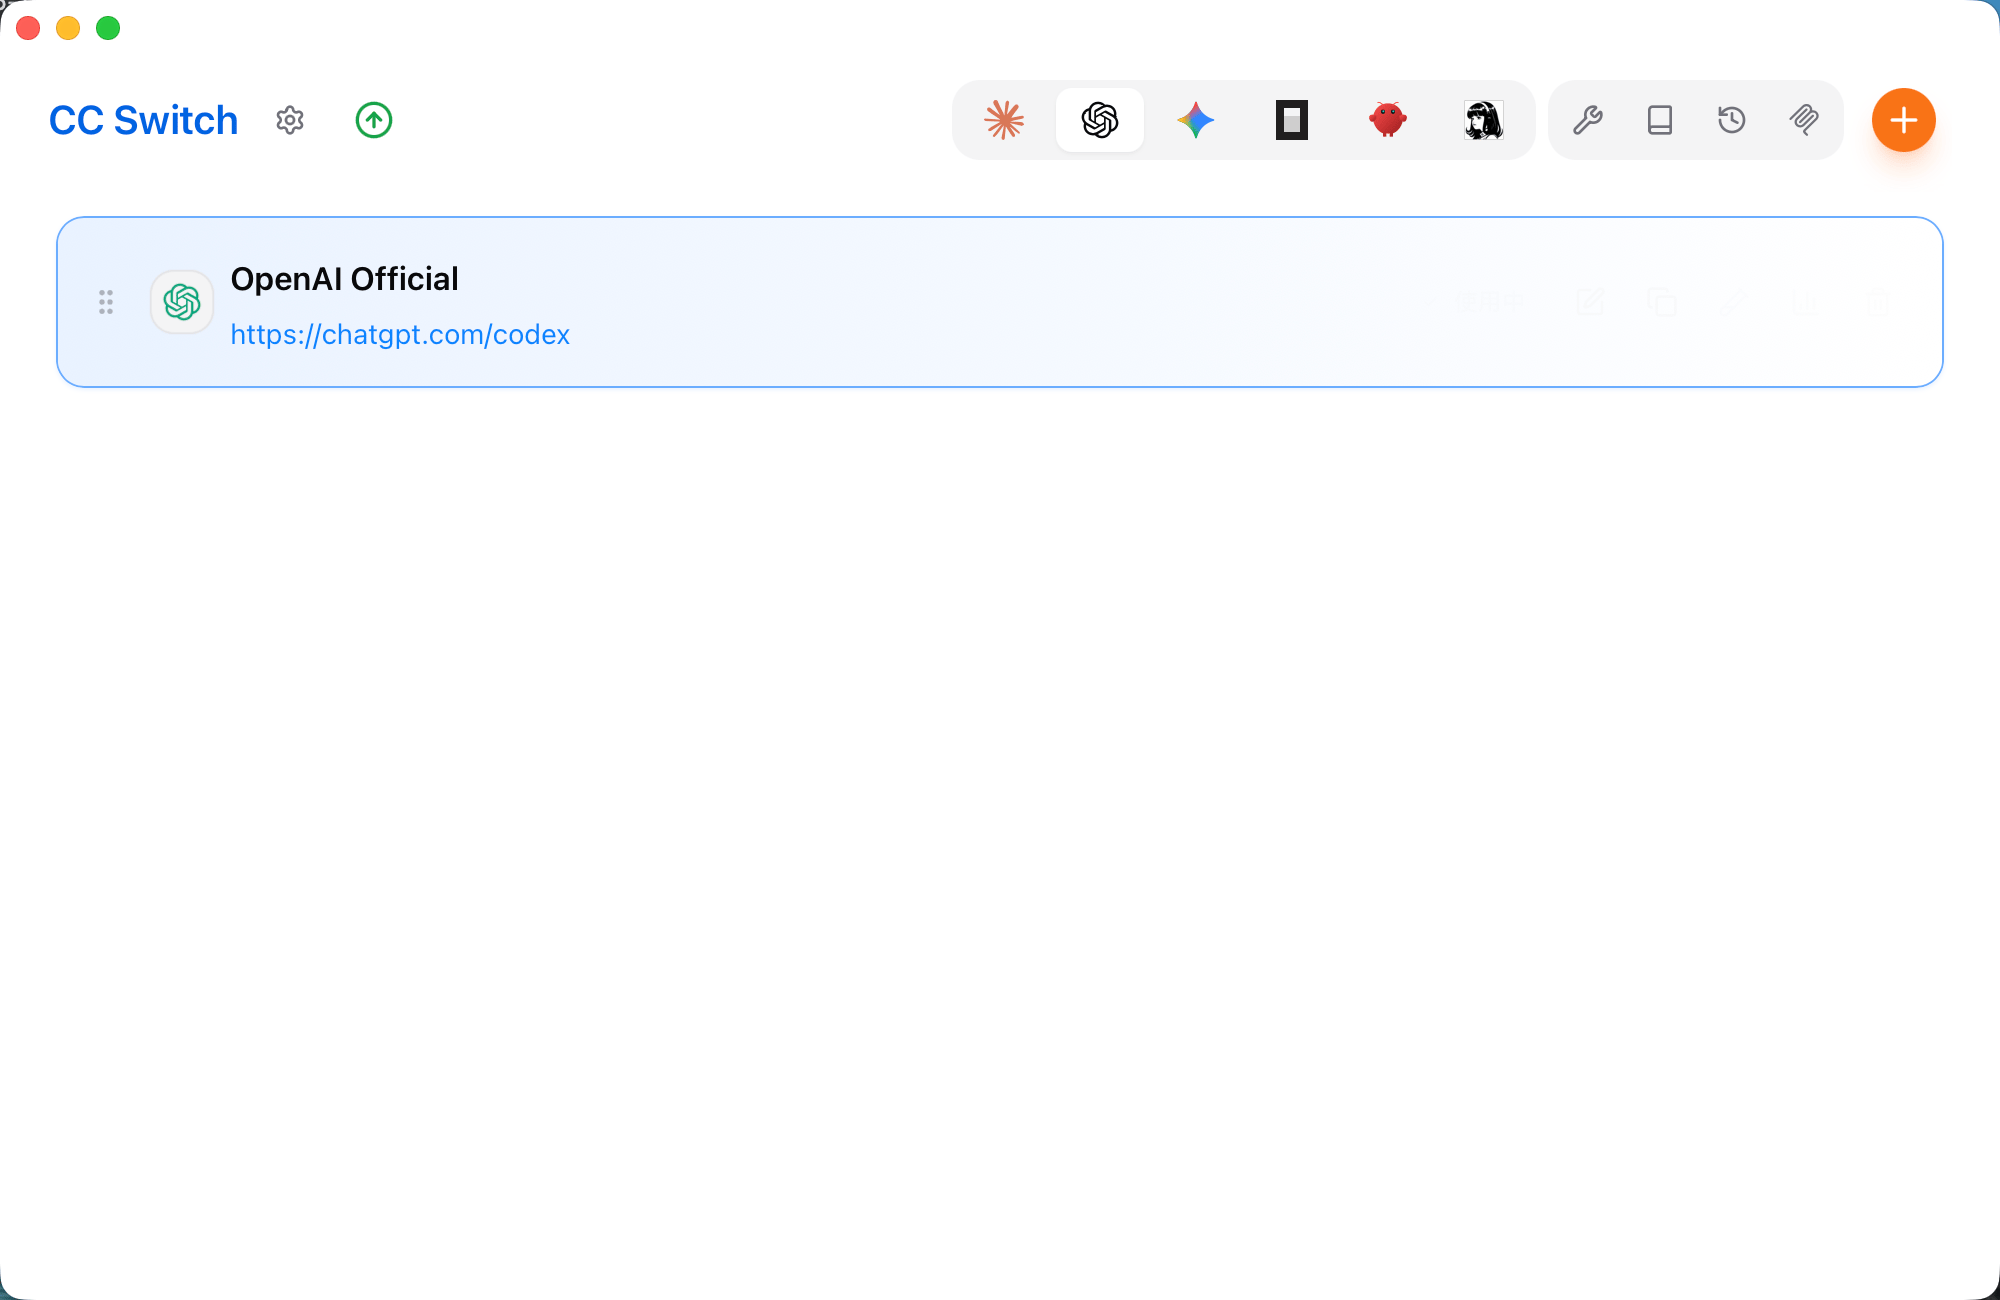
1. 打开你下载的CC Switch软件,你会看到如下图的初始界面
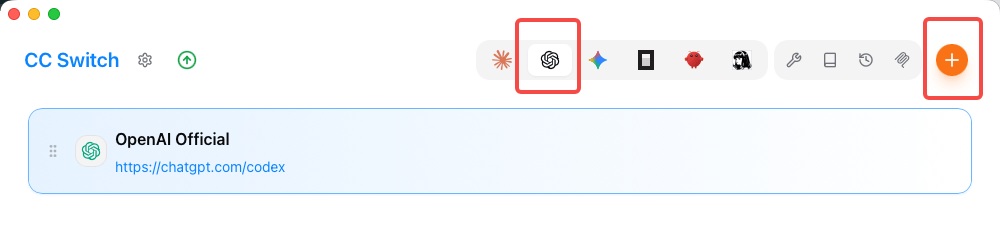
 2. 在分组条中,将分组选择至“Codex”,并点击➕添加渠道
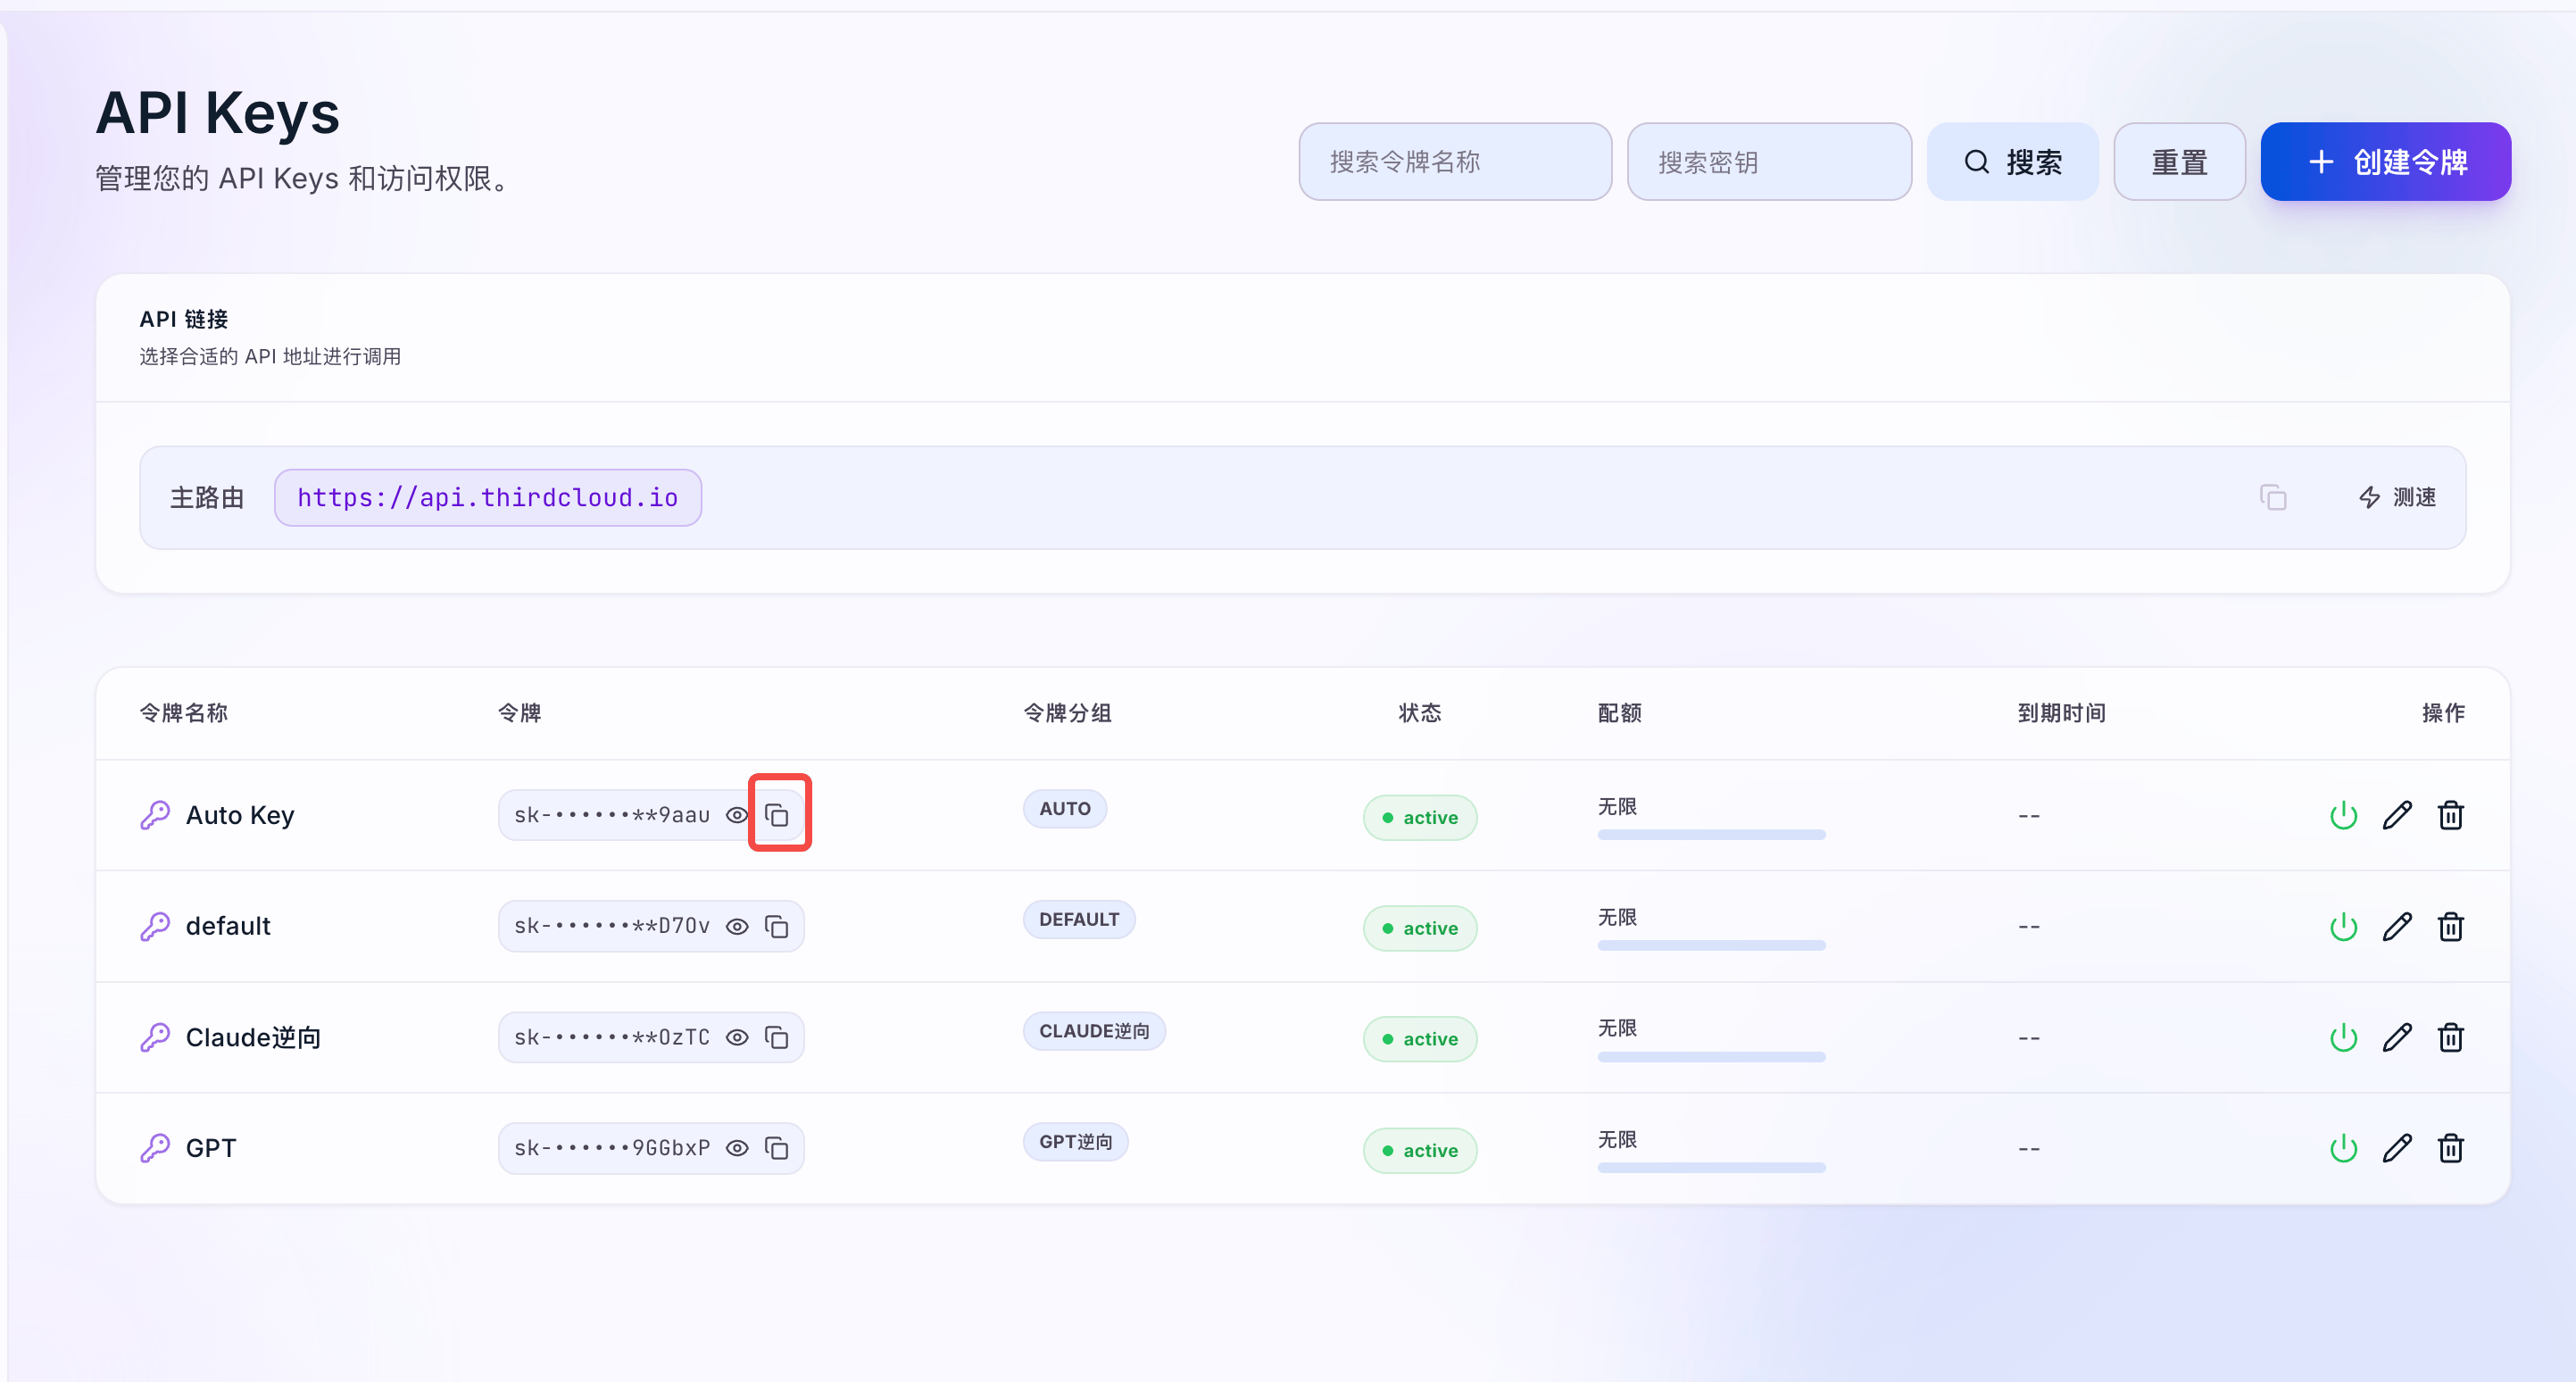
 3. 进入API 令牌页面创建/复制需要用到的Key
 4. 选择Codex供应商及自定义配置
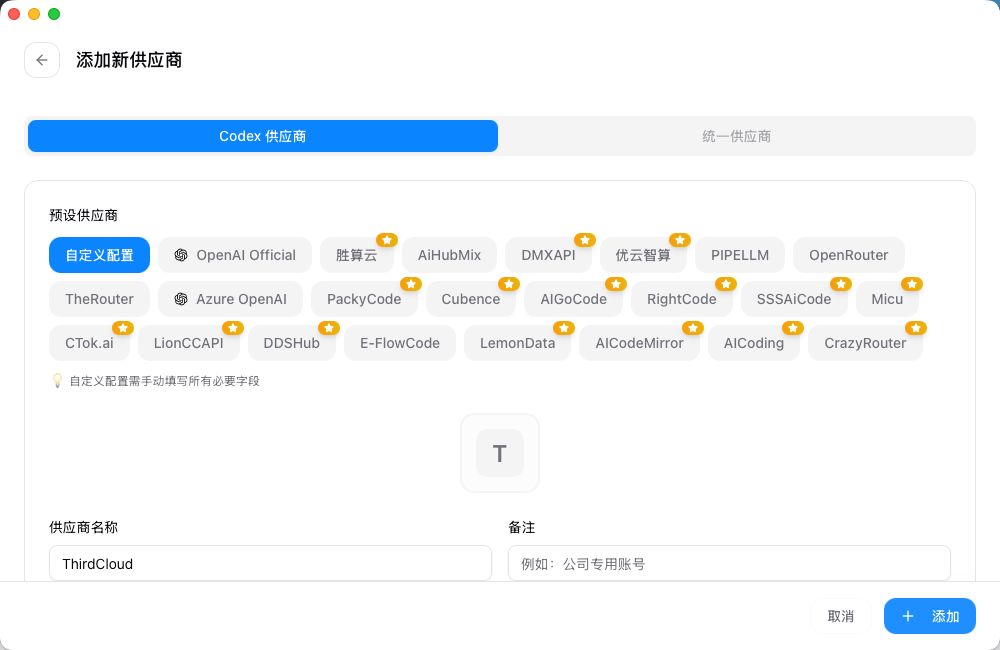 5. 填写对应的参数
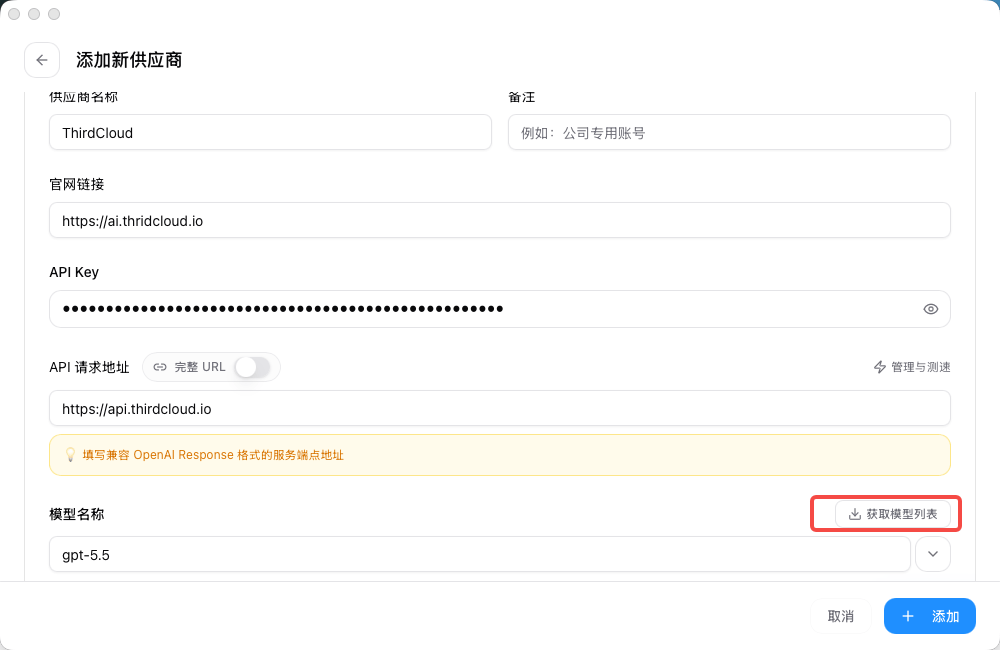 * 供应商名称:Thirdcloud,或者可以自定义
* 官网链接:[https://ai.thirdcloud.io/](https://ai.thirdcloud.io/)
* API Key: 粘贴步骤3中复制的Key
* API 请求地址:[https://api.thirdcloud.io/v1](https://api.thirdcloud.io/v1), 这个必须填写正确
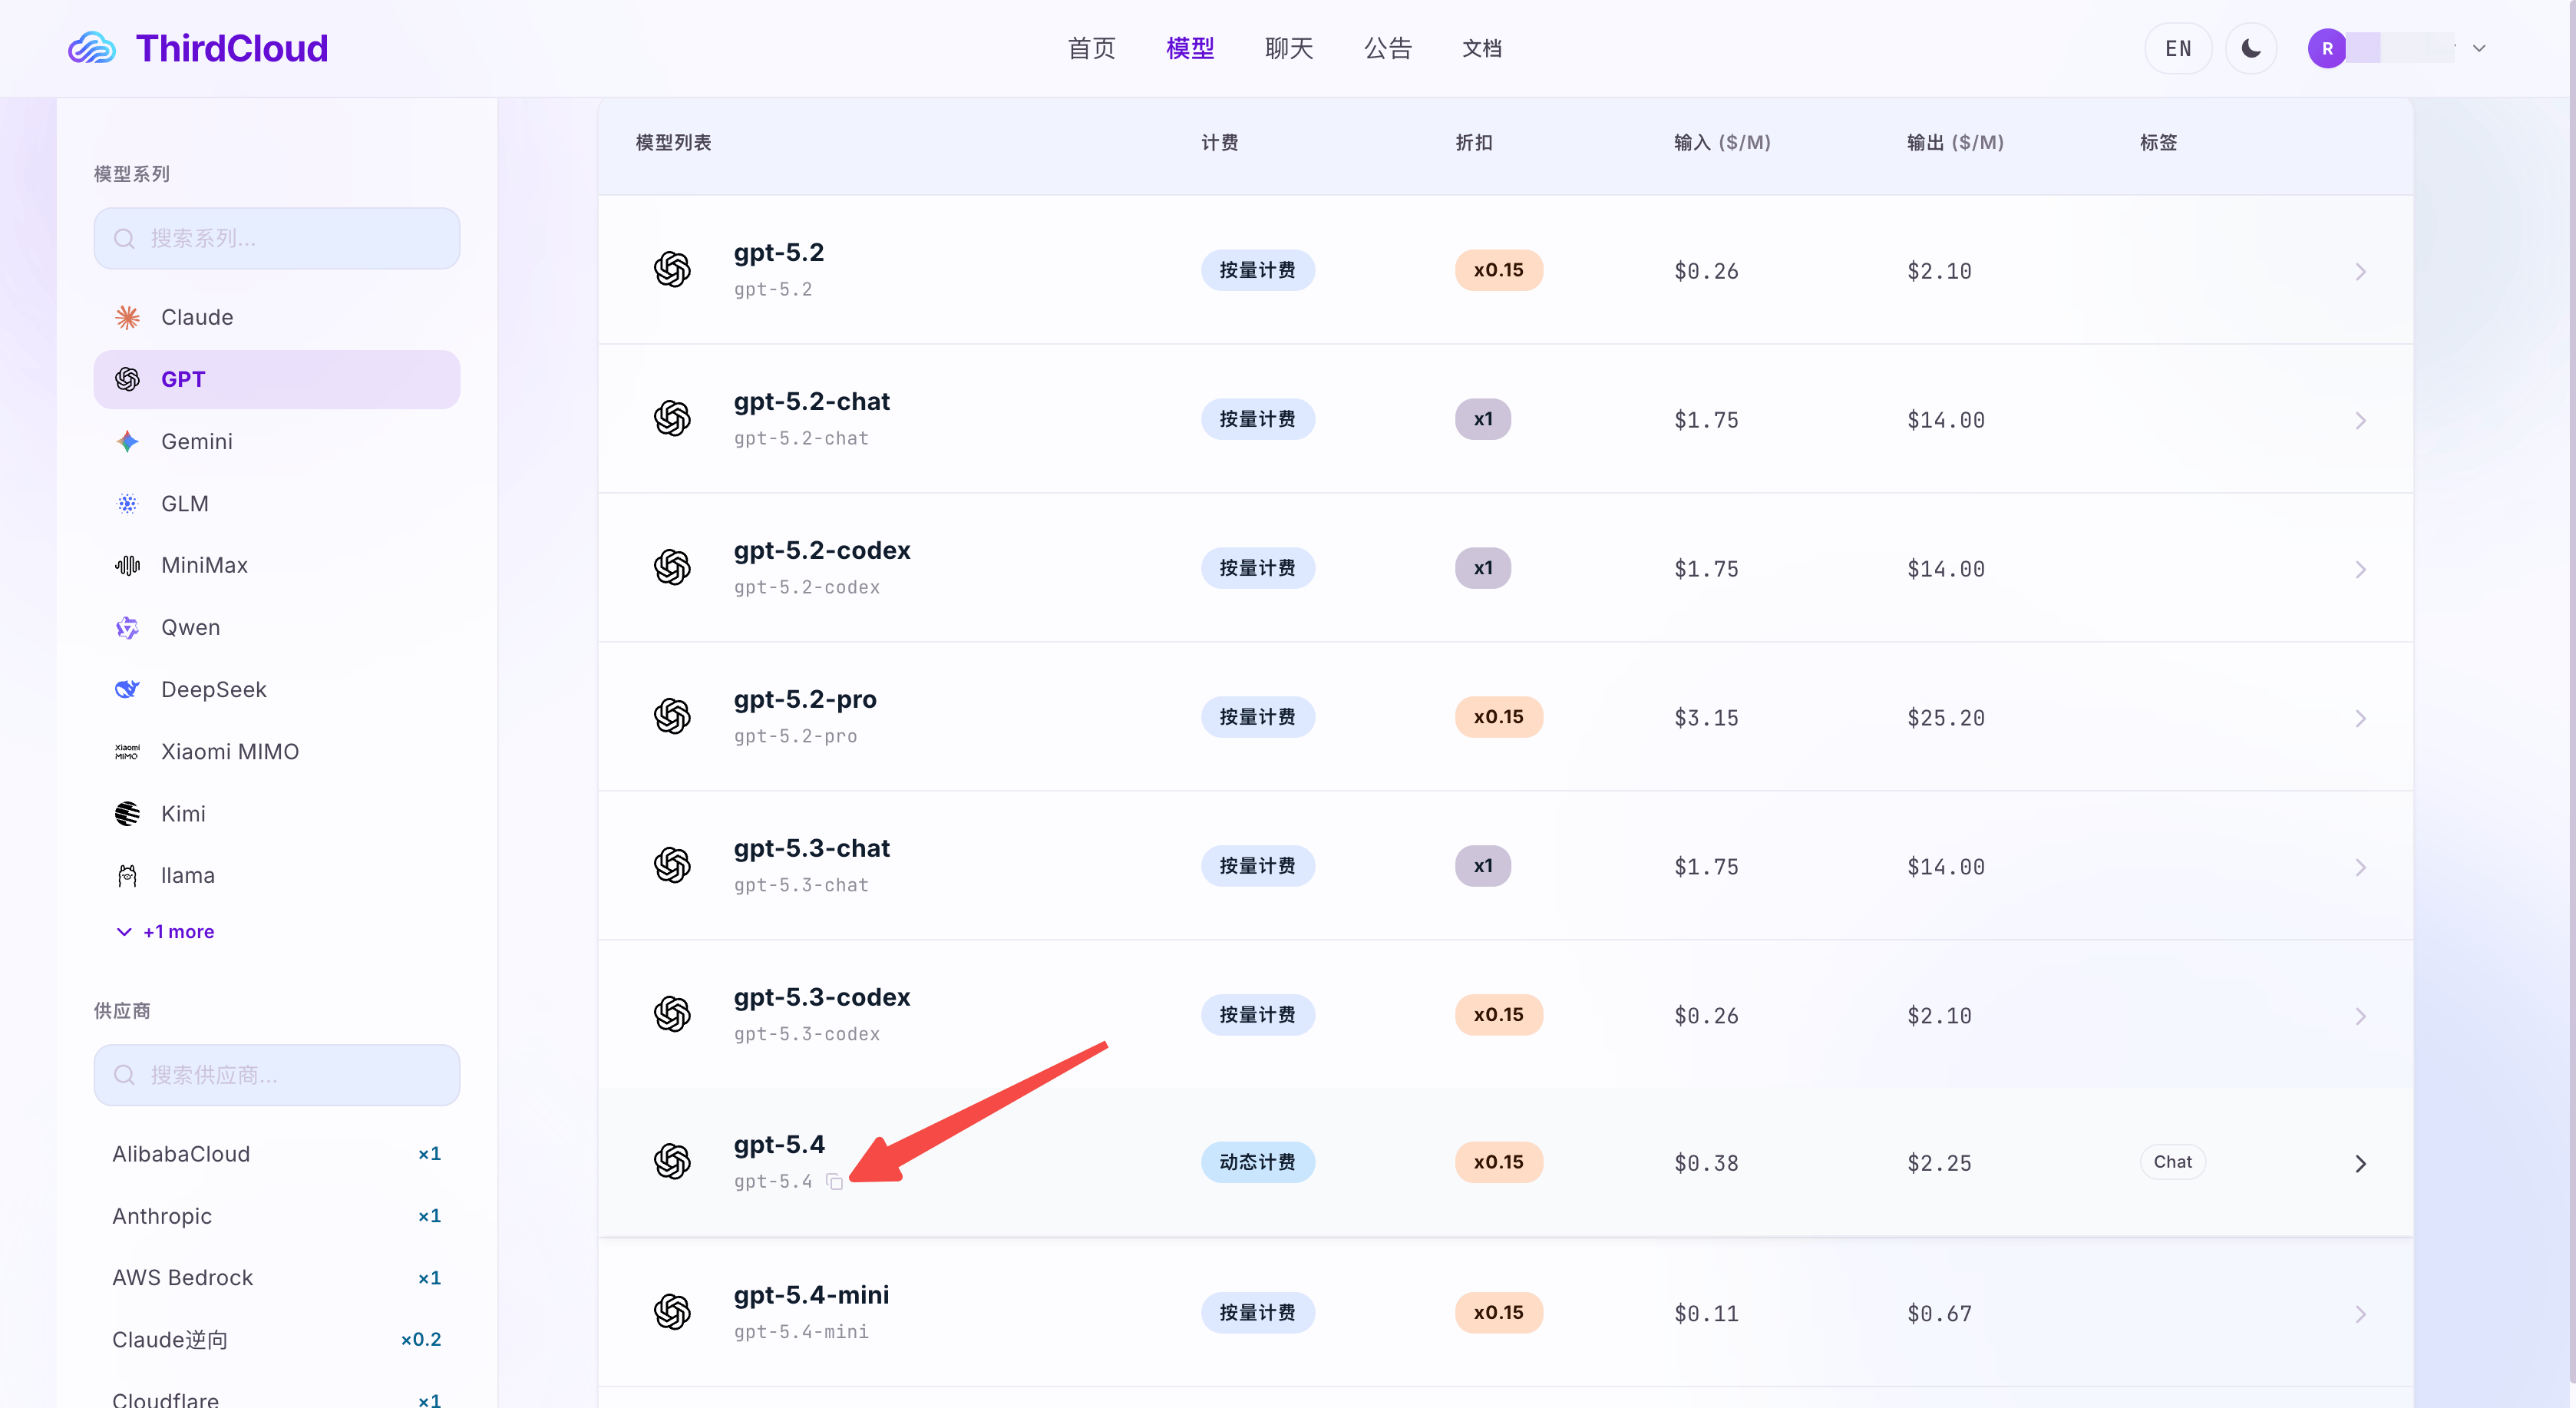
* 模型名称:上述填写正确后,可以点击获取模型列表,选择自己需要用的模型,也可以从模型列表中复制Model ID 粘贴到此处
* 供应商名称:Thirdcloud,或者可以自定义
* 官网链接:[https://ai.thirdcloud.io/](https://ai.thirdcloud.io/)
* API Key: 粘贴步骤3中复制的Key
* API 请求地址:[https://api.thirdcloud.io/v1](https://api.thirdcloud.io/v1), 这个必须填写正确
* 模型名称:上述填写正确后,可以点击获取模型列表,选择自己需要用的模型,也可以从模型列表中复制Model ID 粘贴到此处
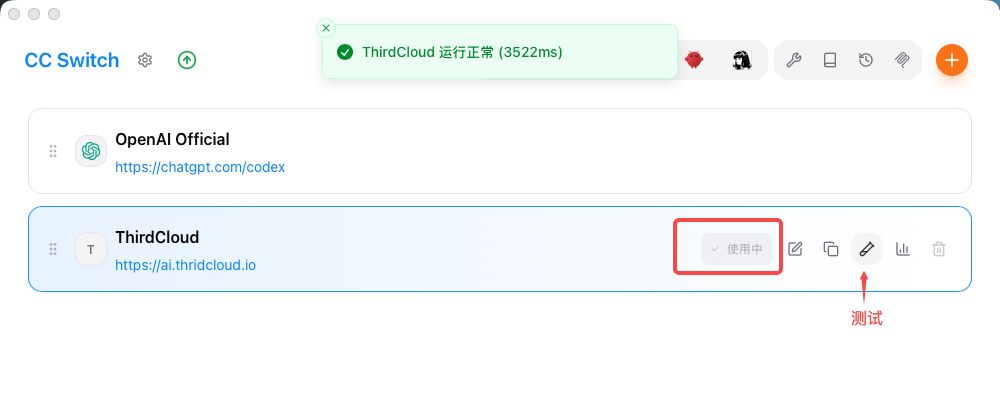
 6. 点击添加完成保存,此时可以看到我们配置的分组,在右侧点击“启用”按钮,显示使用中,则配置完成。也可以点击测试按钮进行尝试测试。
 6. 完成配置后,记得重启下Codex,即开始使用